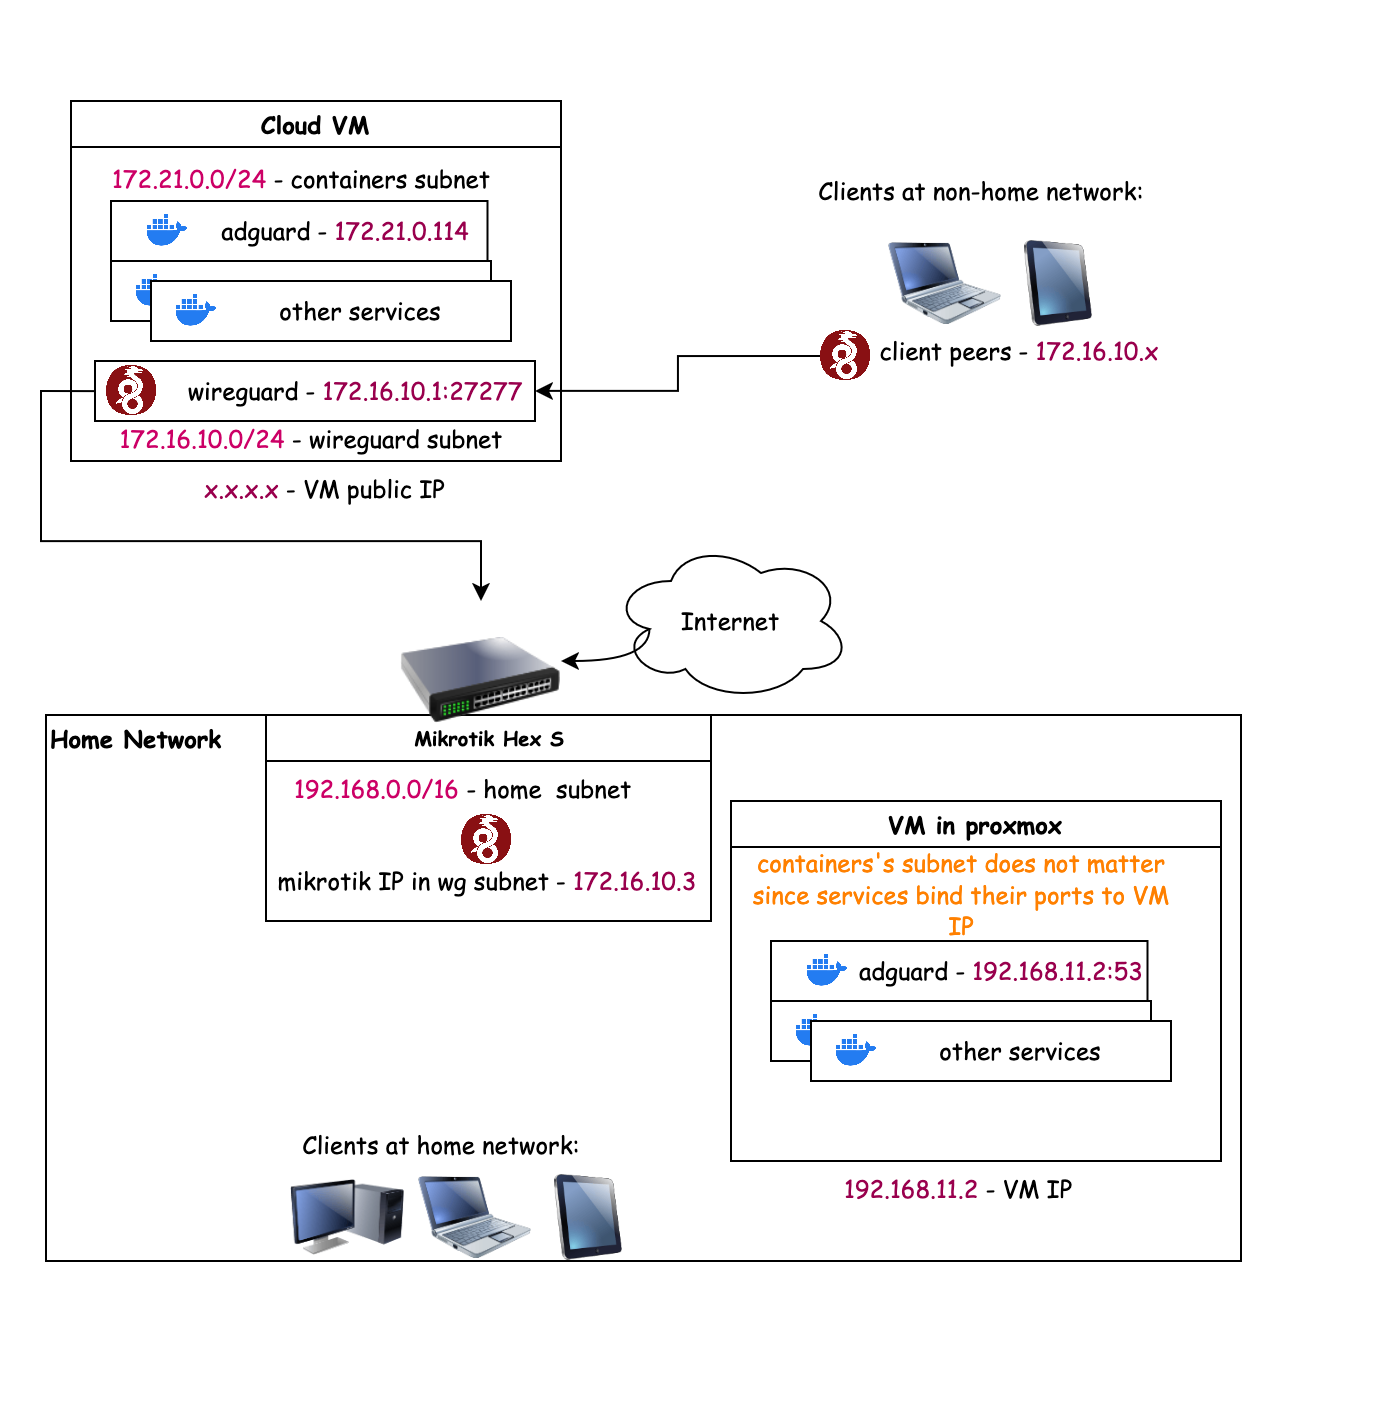
Recently I have configured out how to access my home and cloud network remotely using WireGuard and Mikrotik Hex S router. With this step-by-step tutorial I will show you (and perhaps my future self) how to do it.
Requirements
What I have
-
A Mikrotik Hex S router with a dynamic public IP address.
-
Services in a cloud VM (Ubuntu 22) with a static public IP address.
-
Services in a VM on my home network.
-
Clients - laptops and phones - that need to access the services in my home and cloud network.
What I want
-
Clients outside of my home network should be able to access services both on my home and cloud network.
-
Only traffic to my home and cloud network should be routed through the VPN.
-
Clients inside my home network should be able to access services on my cloud network without additional configuration.
-
No external centralized service should be used.
-
No open ports on my home router.
Implementation
Nowadays, there are plenty of VPN solutions like zero-tier and tailscale. However, I think they are too bloated for my humble needs and WireGuard is more than enough for that.
Because of last requirement, it’s obvious that traffic to home network should be routed though my cloud server.
So, I will use WireGuard to create a tunnel between mikrotik router and cloud server.
This way, I can access my home network from anywhere without exposing any ports on my home router.
I. Initial configuration of WireGuard on cloud VM
For the sake of reproducibility and simplicity I will use vanilla wireguard and configure it on OS level, not in docker container.
1. Install wireguard on Ubuntu 22.04
sudo apt update
sudo apt install wireguard -y

# Edit the configuration file
sudo nano /etc/sysctl.conf
# Find and uncomment the line:
net.ipv4.ip_forward=1
# Save and exit

# Then apply the changes:
sudo sysctl -p
2. Create public and private key
sudo su -
cd /etc/wireguard
# Generate private and public keys
wg genkey | tee privatekey | wg pubkey > publickey

# Check the keys
cat privatekey
cat publickey
3. Create the configuration file
I will use 172.16.10.0/24 subnet for Wireguard network.
sudo nano /etc/wireguard/wg0.conf
# Add the following lines:
[Interface]
Address = 172.16.10.1/24
ListenPort = 27277 # You can choose any port you want
Privatekey = <your_private_key> # from previous step

# These are placeholder lines for next steps, keep them commented for now
# # Mikrotik peer
# [Peer]
# AllowedIPs = 172.16.10.0/24,192.168.0.0/16
# PublicKey = mikrotik public key

# # client peer
# [Peer]
# AllowedIPs = 172.16.10.2/32
# PublicKey = first client device public key

# CRTL+X: save and exit

# Change the permissions of the configuration file
chmod 600 wg0.conf
4. Start the WireGuard interface
# Enable service to start on boot
systemctl enable wg-quick@wg0.service
systemctl daemon-reload
# Start the service
systemctl start wg-quick@wg0
# Check wg status
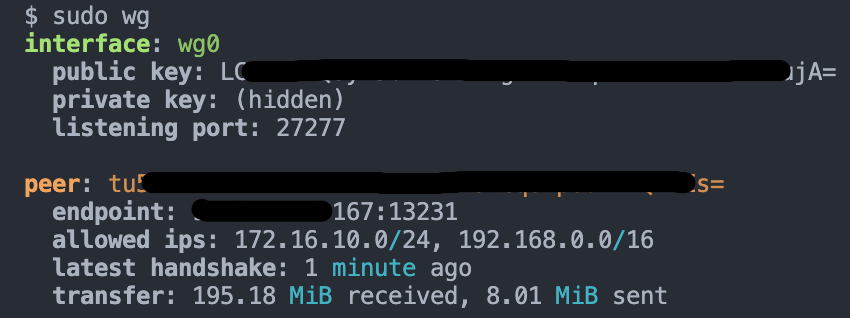
wg
It should show the interface is up like this

More commands to check the status of the service:
# Check the status of the service
systemctl status wg-quick@wg0
# Restart the service if needed
systemctl restart wg-quick@wg0
II. Mikrotik configuration
I will use Mikrotik command line interface (CLI) to configure the router. You can use Winbox or WebFig if you prefer.
1. Create WireGuard interface
# Create WireGuard interface and it will automatically generate private and public keys
/interface wireguard add listen-port=13231 mtu=1420 name=cloud-wg
# Add the IP address to the interface
/ip add address=172.16.10.3/24 interface=cloud-wg network=172.16.10.0

# Print the keys, you will need only the public key later
/interface/wireguard/print
2. Create the peer
Here we add cloud vm as a peer to the Mikrotik router’s wireguard. The public key of the cloud server is needed here.
# In allowed-address we add IP ranges which will be routed through this peer
# 172.21.0.0/16 - subnet of docker containers on cloud server
# 172.16.10.0/16 - subnet of wireguard network
/interface wireguard peers add allowed-address=172.16.10.0/24,172.21.0.0/16 \
    endpoint-address=cloud.vm.ip.address \
    endpoint-port=27277 \
    interface=cloud-wg \
    public-key="PUT CLOUD SERVER PUBLIC KEY HERE" \
    name=peer1 persistent-keepalive=25s

# Here is a tricky part
# Routing rule for subnet of wireguard network is added automatically on adding IP address to the interface
# But we need to add explicitly the route for docker containers subnet
# You may need to adjust the distance and routing-table values
/ip route disabled=no distance=1 dst-address=172.21.0.0/16 gateway=cloud-wg routing-table=main scope=30 suppress-hw-offload=no target-scope=10
3. Add WireGuard peer (VM)
sudo nano /etc/wireguard/wg0.conf
# Uncomment the lines for Mikrotik peer
# Mikrotik peer
[Peer]
AllowedIPs = 172.16.10.0/24,192.168.0.0/16
PublicKey = mikrotik public key

# Save and exit

# Restart the WireGuard service
sudo systemctl restart wg-quick@wg0
# Check if changes are applied
wg show
You should see the Mikrotik peer in the list of peers.
More commands to tests connection between cloud vm and mikrotik wg
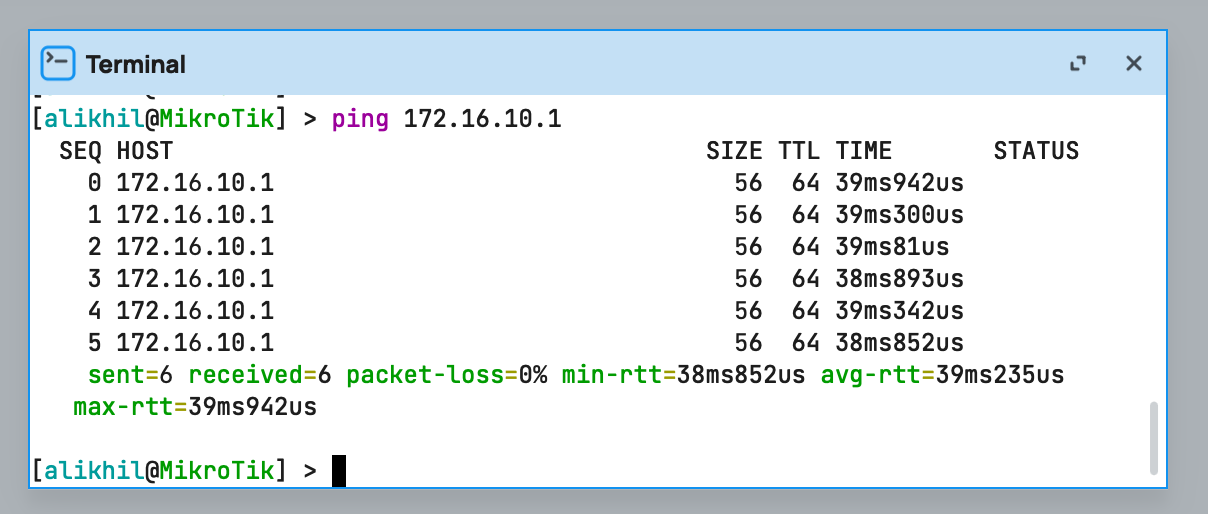
Run in mikrotik CLI
# ping wireguard IP of cloud server
ping 172.16.10.1
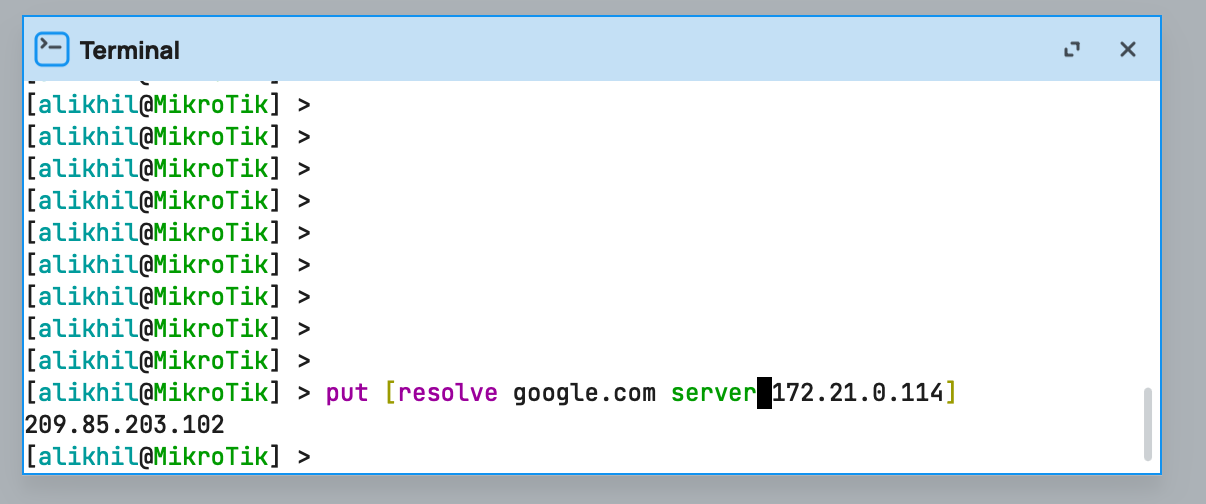
# resolve google.com via adguard container on cloud vm
put [resolve google.com server 172.21.0.114]
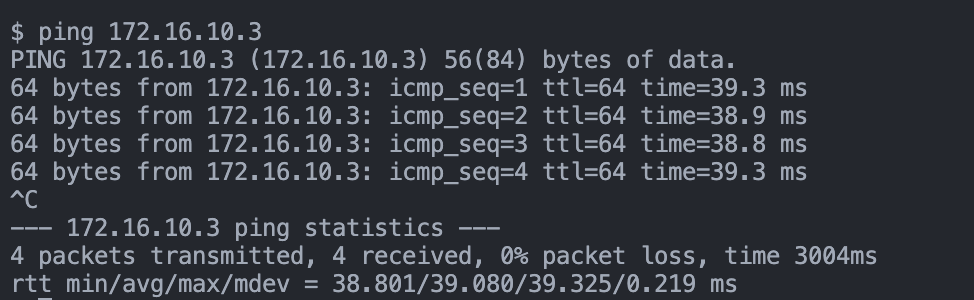
Run in cloud server
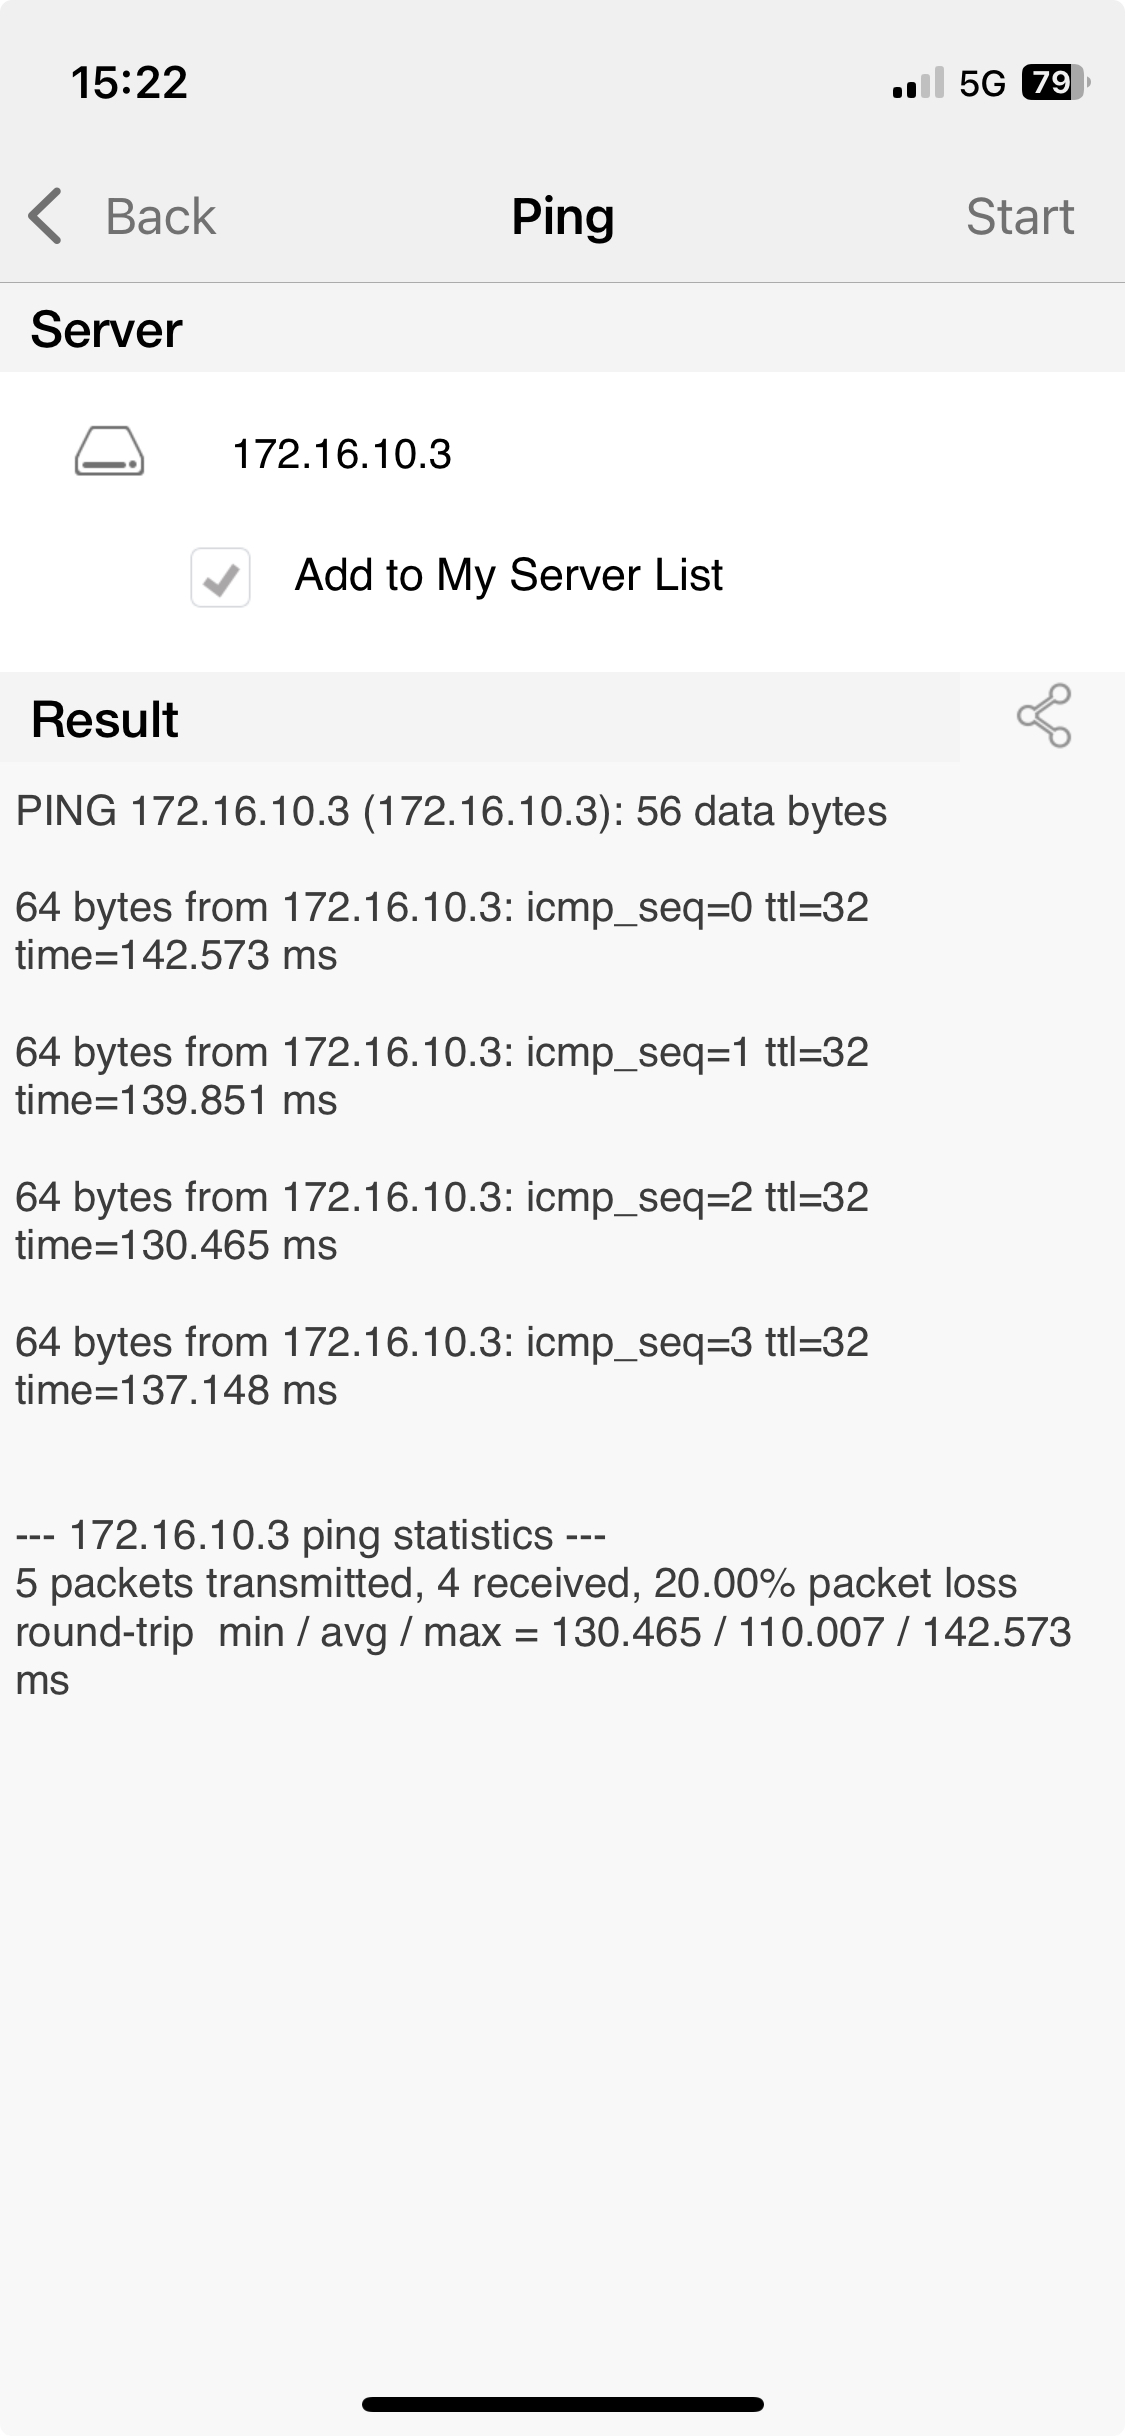
# ping wireguard IP of Mikrotik router
ping 172.168.10.3
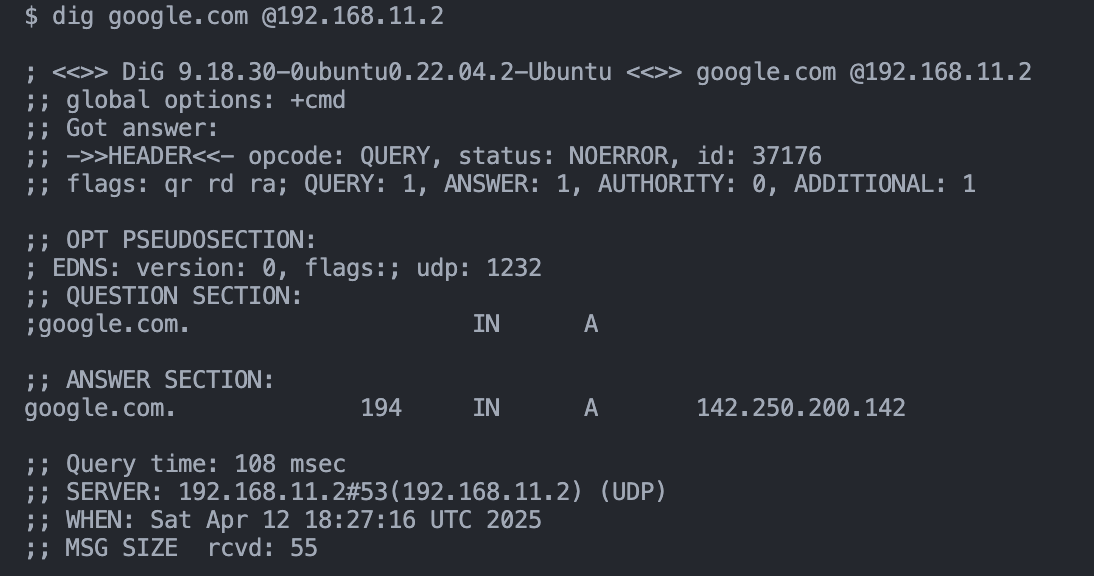
# resolve google.com via adguard container on home adguard
dig google.com @192.168.11.2
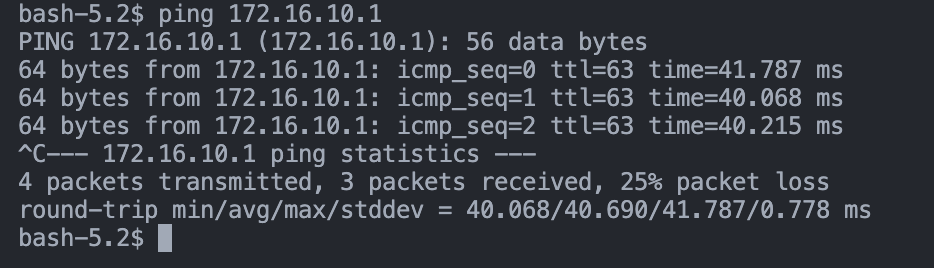
Run on my Mac connected to home network
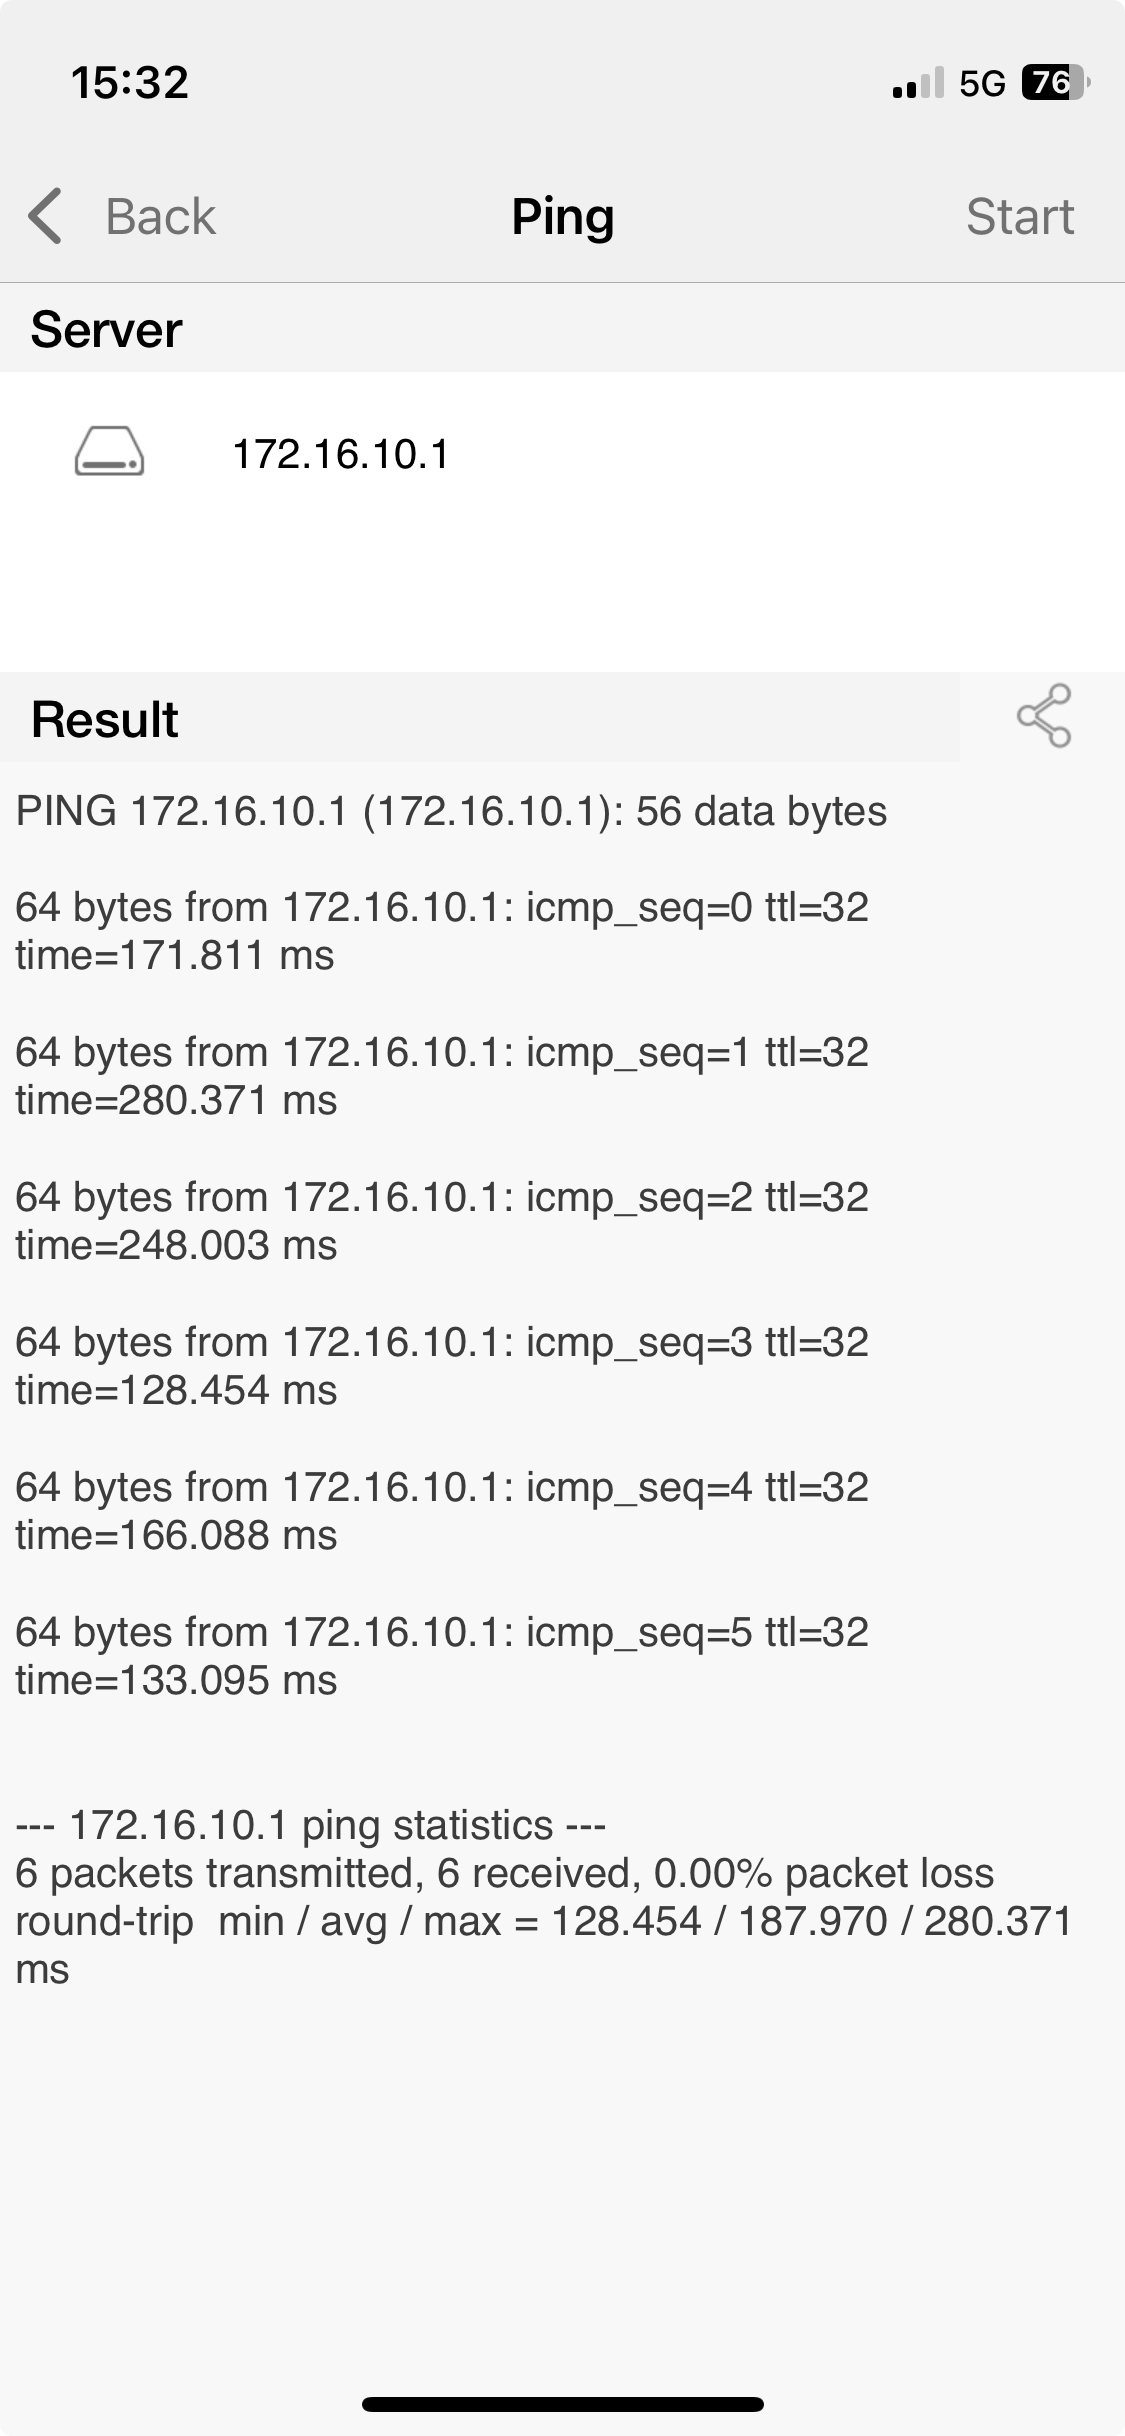
# ping wireguard IP of cloud server
ping 172.16.10.1
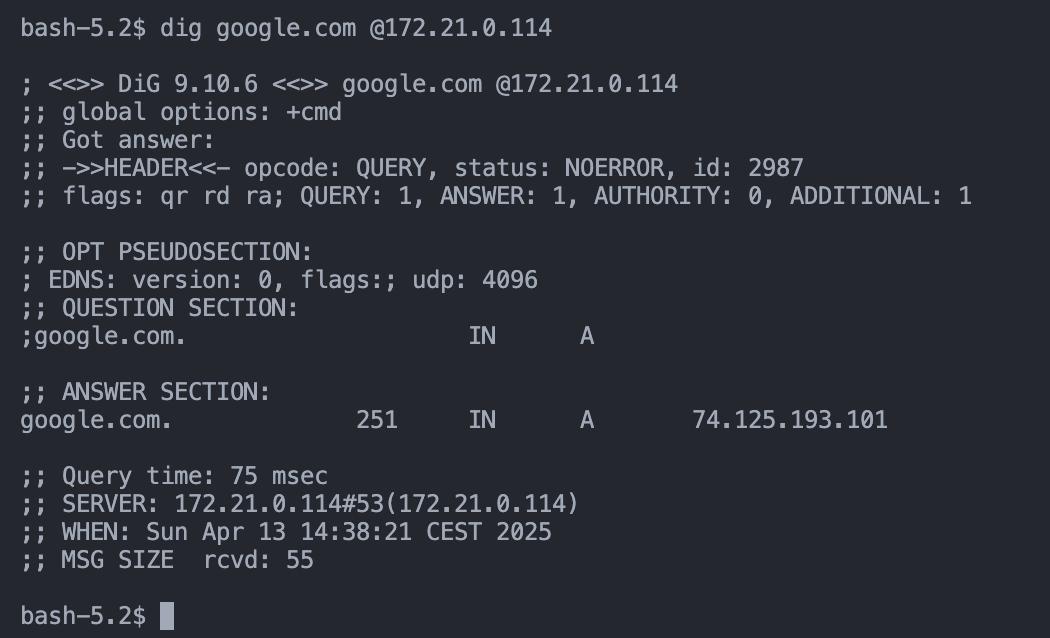
# resolve google.com via adguard container on cloud adguard
dig google.com @172.121.0.114
IV. Add first client device as a peer
I recommend you to use your smartphone as first client device, because it can work from both home WiFi and mobile data. This way you can test the connection from both networks.
Also, install on your smartphone:
1. Create keys for the client
Install Wireguard app for your client OS.
Then, generate public and private keys on the device, for that create config from scratch in the app and then click on Generate keypair button.
Or you can generate keys on the cloud server and then copy them to the client device.
wg genkey | tee peer-privatekey | wg pubkey > peer-publickey
2. Add the client as a peer to WireGuard config on cloud server
On the cloud server, edit the WireGuard config file and add the client as a peer.
Each time increment previous peer address by 1.
sudo nano /etc/wireguard/wg0.conf
# Uncomment the lines for client peer
# client peer
[Peer]
AllowedIPs = 172.16.10.2/32
PublicKey = put public key

# CRTL+X: save and exit

# Restart the WireGuard service
sudo systemctl restart wg-quick@wg0

# Check if changes are applied
wg show
3. Continue configuring the client device
You already have public and private keys for the client device, other configuration parameters are:
Interface
- Address - It’s address of peer in wireguard subnet. Put the same address you set in
AllowedIPsfield in previous step. - DNS servers - if you have adguard/pihole running on the cloud server, you can use it as a DNS server. Put it’s IP address here.
- MTU and ListenPort - you can leave them empty, they will be set automatically.
Peer
- Endpoint - cloud server IP address and port (27277)
- Public key - public key of the cloud server
- AllowedIPs - here we put all subnets that we want to access from this current client device
Here is an example of the configuration file for the client device:
[Interface]
PrivateKey = private-key-of-client-device
Address = 172.16.10.2/32
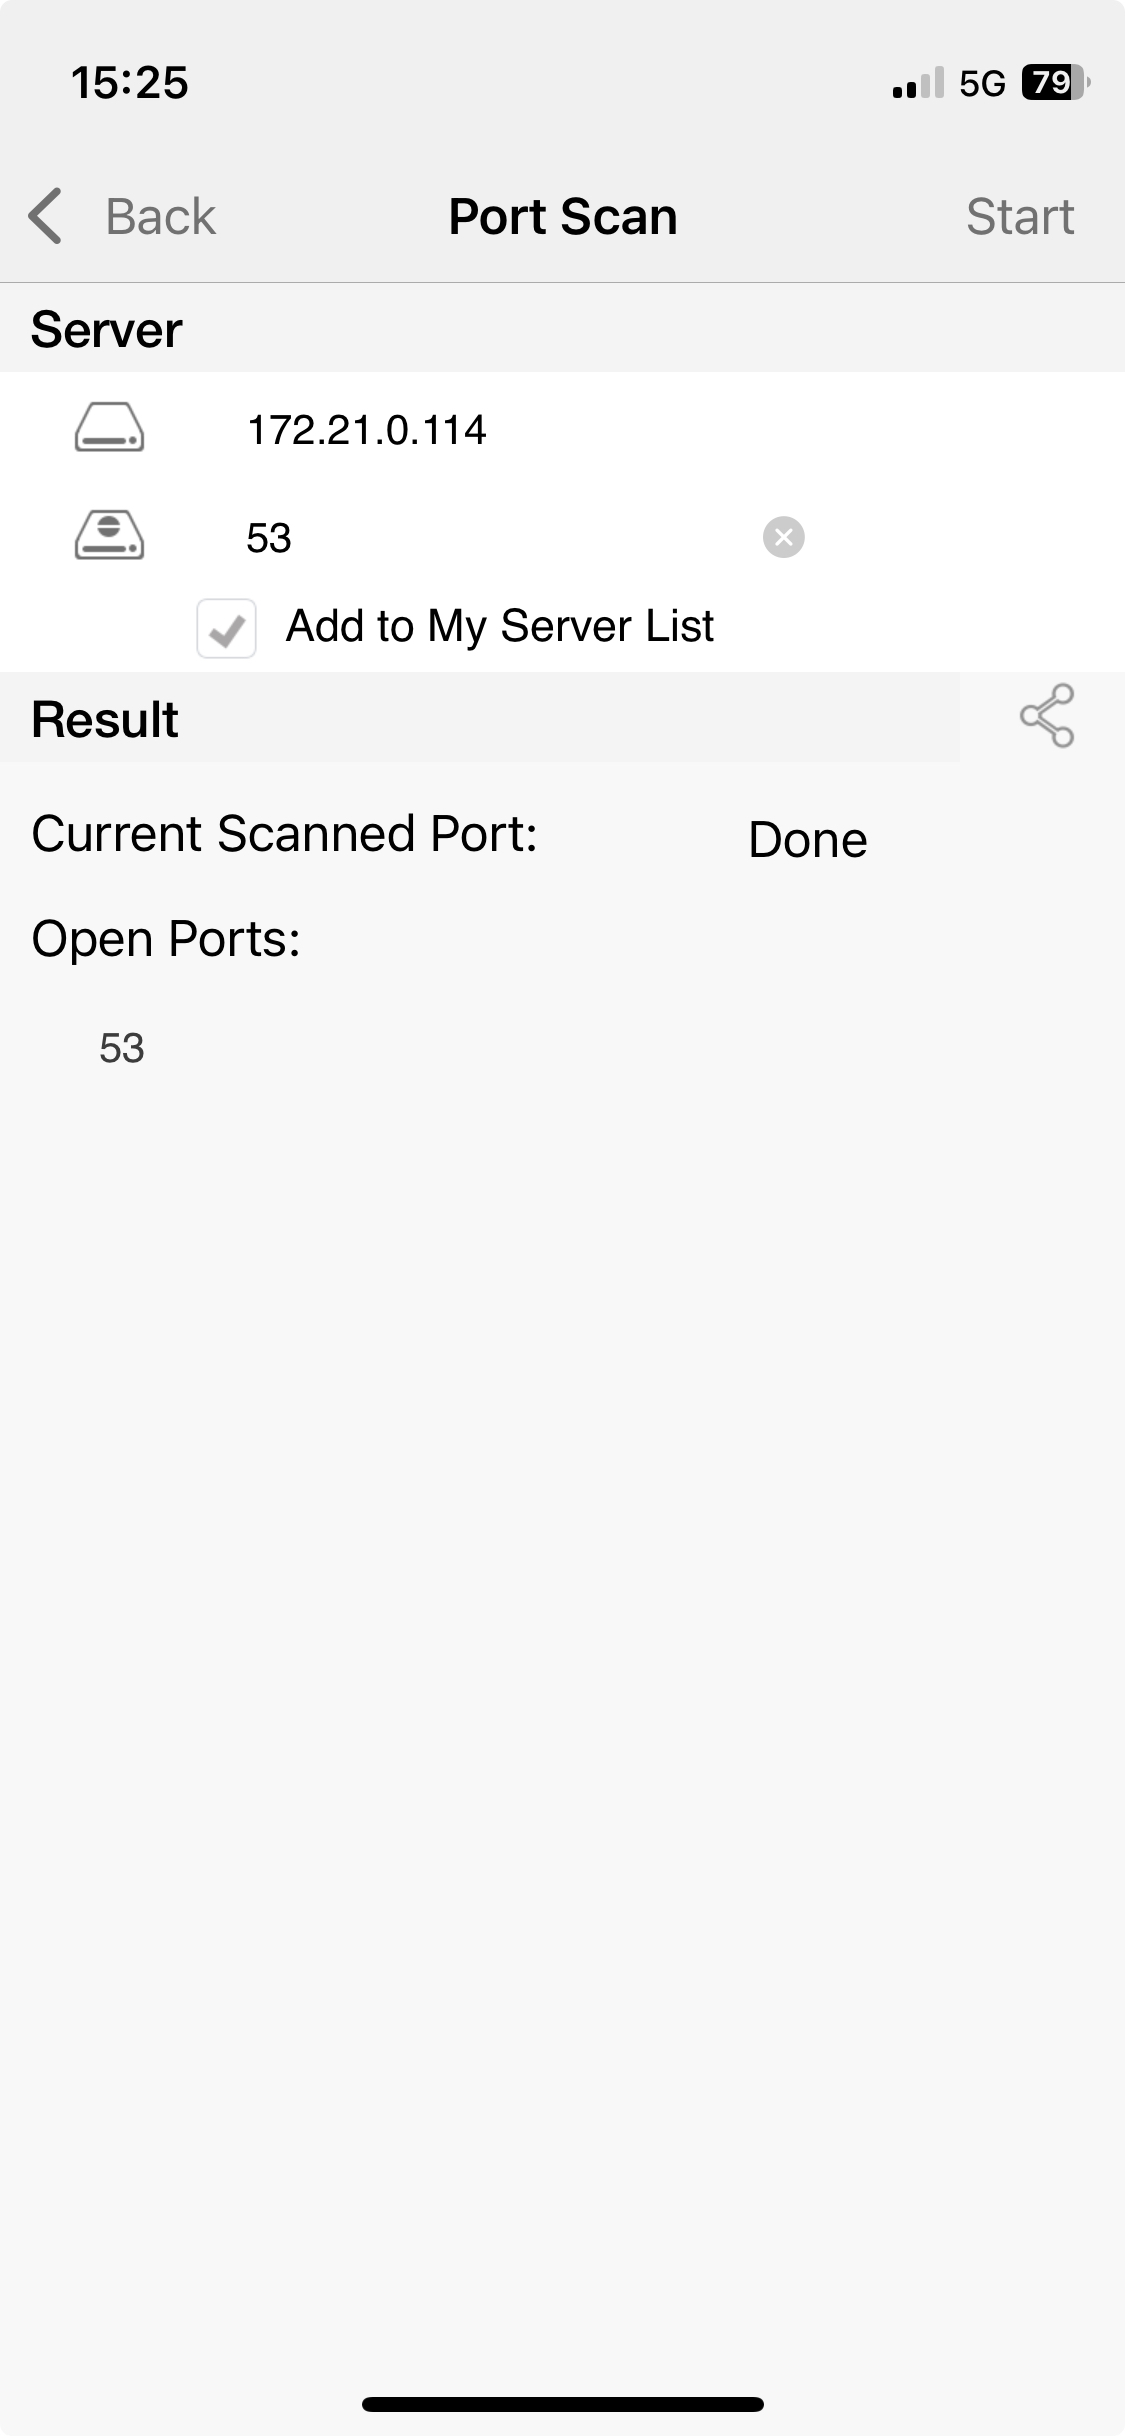
DNS = 172.21.0.114 # IP of adguard container on cloud server
[Peer]
PublicKey = public-key-of-cloud-server
AllowedIPs = 192.168.0.0/16, 172.16.10.0/24, 172.21.0.0/16 # subnets of home, cloud and wireguard network
Endpoint = ip.of.cloud.servner:27277
That’s it! Disconnect your device from the home Wi-Fi, switch to mobile data and connect to the VPN.
Then try to:
- ping the cloud server and Mikrotik router IP addresses in wireguard subnet.
- check ports of services in docker containers on cloud and home server VM.
| ping cloud | ping home | check adguard port |
|---|---|---|
 |
 |
 |
V. Bonus. DNS configuration
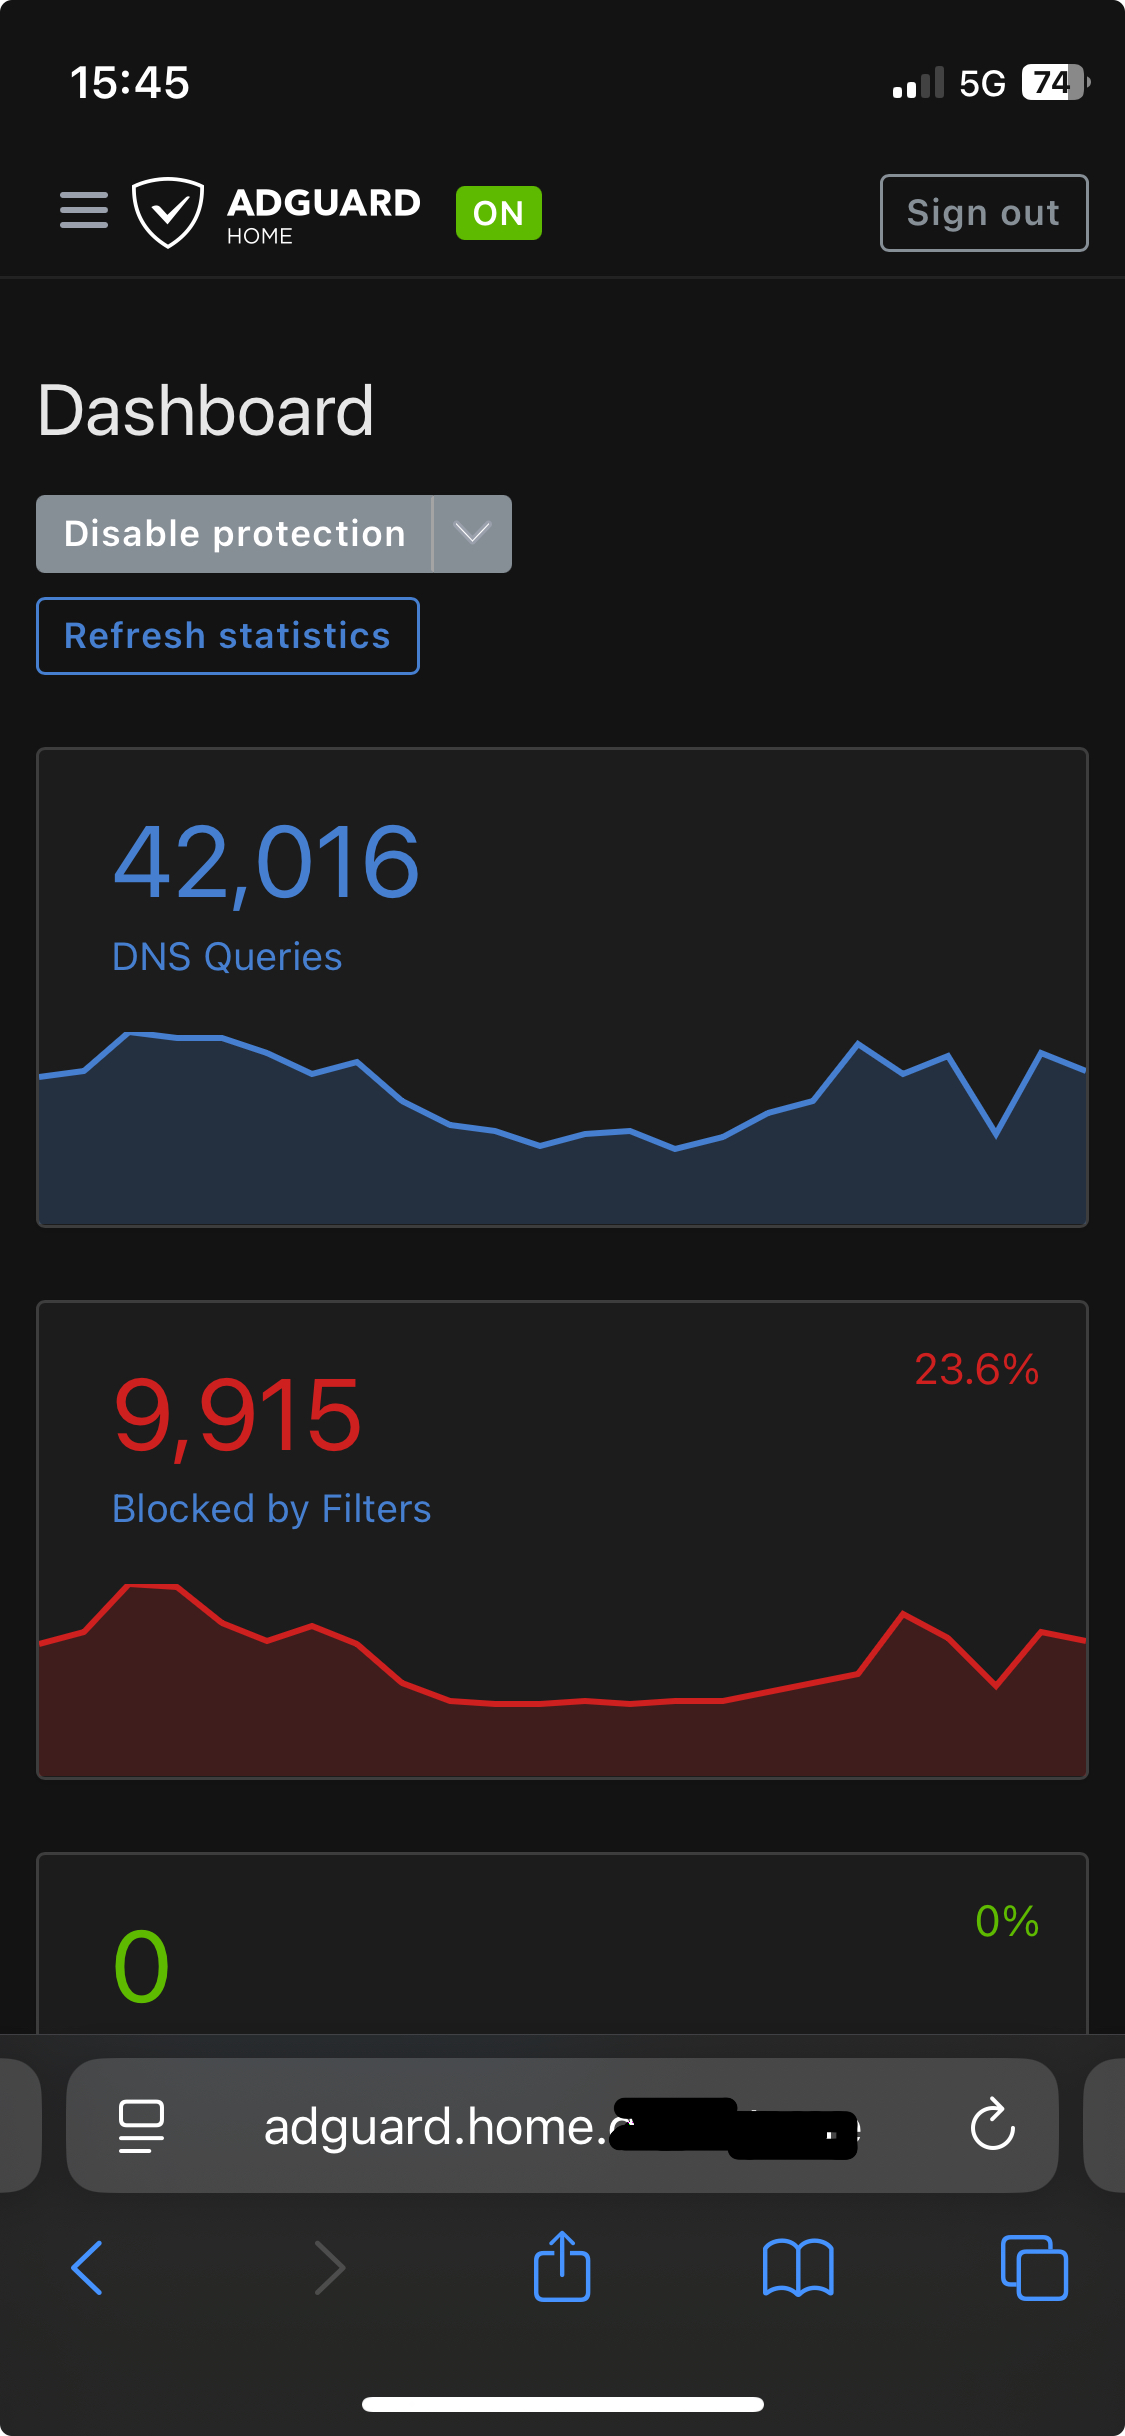
Since I have 2 adguard instances and I use them as DNS servers everywhere, I will add DNS records for accessing my services:
- *.cloud.domain.com - pointing to traefik docker container on cloud server
- *.home.domain.com - pointing to traefik docker container on home server
Thus, I can access my services using domain names instead of IP addresses.
VI. Final thoughts
I hope this tutorial was helpful for you. I will keep it updated if I find any issues or improvements.
If you have any questions or suggestions, feel free to leave a comment below.
Credits to @laroberto for their guide on LAN access with WireGuard. I followed it to set up the initial configuration and then adapted it to my needs.